
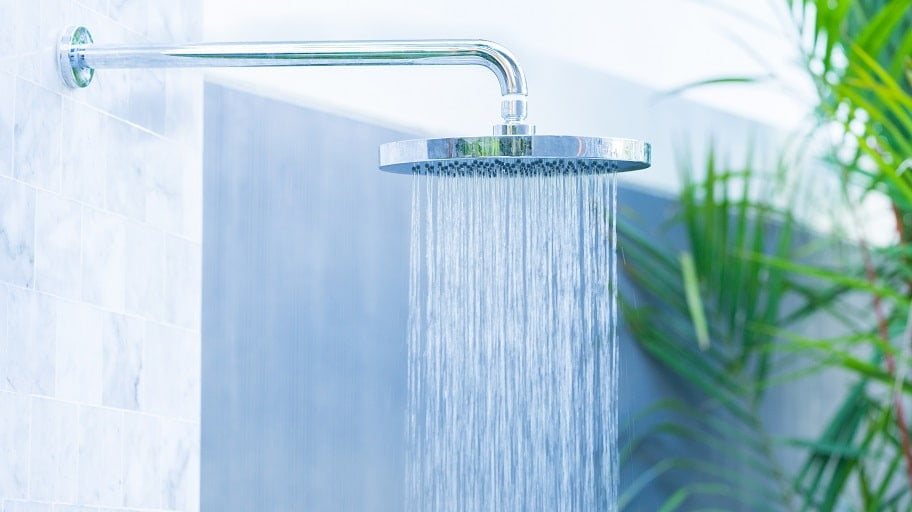
A fresh morning shower – this is, maybe, the most enjoyable part of our daily routine. It makes sense that you might want to ensure that this experience is as pleasant and comfortable as possible. A small upgrade to your bathroom can make a big difference. One of the simplest ways is to install new fixtures or to change the shower head.
Generally, shower heads last for years, but their appearance can become worn and dated. The main reasons you might have to consider, regarding whether it’s time to change it are:
So, if you don’t know how to change a showerhead, read on to get all the information you need.
Mineral deposits and organic matter build up over time and can clog the holes, preventing an even water flow. If the residues are old, cleaning the holes most likely won’t help, but it’s definitely worth a try. Cleaning the shower head is not only crucial for better performance, but for sanitary reasons, too.
Pour some vinegar into a plastic bag and tie it to the shower head for at least 15 to 20 minutes. This method is quite simple and used when you don’t want to remove your shower head completely. For extra cleaning power, add a few tablespoons of baking soda to the mixture before soaking.

This task is one of the simplest DIY plumbing jobs you can do in your home and can be easily done by anyone like other home improvement tasks. Changing a shower head doesn’t normally require any technical expertise to perform, still, it is good to check what are the local regulations in regards to plumbing repairs.
Adding a new shower head is also a great way to improve your water’s purity and flow and refresh your bathroom space. There is a wide variety of styles and finishes. It’s easy to select a model that brings your bathroom to life and makes you feel like you’re stepping into a spa centre.
Australian government initiated free shower head upgrade programs in some cities and regions.
Let’s start by choosing your new showerhead. There are three common types: fixed, handheld, and combo. All have a universal thread size in Australia, designated as ½” BSP. That means you shouldn’t have to worry about installing the new shower head onto your extension arm or hose.
Anyway, if you aren’t sure, you could always bring your current showerhead with you to the store. Another way is to take pictures of your shower for additional reference.
So, what you’ll need to do the job:
Do not remove the existing shower head with the tap turned on. Water will shoot everywhere, so make sure it’s off. It’s not necessary to turn off the water to the whole place.
Turn the shower head counterclockwise to remove it. If it’s decades old, it could be eroded, and you will need to use a wrench to get it off.
If it’s a wall-fixed one, be careful not to turn the pipe in the wall. If necessary, hold the connecting pipe with the soft jaw pliers or a soft cloth, while turning the shower head by hand. If you can’t, try with the adjustable wrench. Check for a bit of a diamond-cut etched strip. That is designed to help the pliers grip the otherwise smooth surface.
Take a small cloth or towel and wrap it around the connecting nut before you loosen it.
Use a soft cloth under the adjustable wrench to keep the chrome from being scratched.
Once you remove the old shower head, you may find gunk around the threaded end of the flexible shower hose or the shower arm coming through the wall. Use the wire brush, old toothbrush, or damp paper towel to clean the threads. Make sure they are clean and free of debris before the next step.
It’s not uncommon to experience leaks when you connect metal-threaded elements. The thread tape acts as an additional buffer against that.
Wrap the tape around the whole thread in a clockwise direction. Each new layer should cover part of the previous layer. This technique prevents the threads from unravelling the tape as you tighten them.
Squeeze the tape over to smooth it into the threads.
After taping, you’re ready to install the replacement showerhead. This step will also vary depending on the product you’re installing, so read the product’s instructions.
Hand-screw it clockwise onto the threads. When it is secure, tighten it with a quarter turn. If it’s necessary, use the adjustable wrench with a cloth to carefully tighten the shower head. The shower head should feel a little more than snug. Any more than that you risk damaging the threads.
Once you’ve installed your shower head, you will want to make sure there are no leaks before putting the tools away.
Angle the shower head toward a wall away from you and turn the water on. Look for any leaking water from any of the connections. They should all have thread-sealing tape, and probably won’t be leaking.
But if there is a leak, turn the water off again and try to tighten that joint a little. Repeat the test and if your shower head is still leaking, completely reconnect it. Make sure to remove the old thread tape and apply new before putting everything back together.
Check also if the rubber seal is lining up correctly or if it appears damaged.

As a general rule of thumb: if you can’t clean your shower head or it’s too hard to clean up, replace it. Especially if you have hard water, it can be tough to maintain, and it won’t last forever.
Many people don’t realise it, but shower heads should be appropriately cleaned or replaced every 6 to 8 months.

Need help? Call a professional plumber!
Disclaimer
We are a commercial home maintenance service provider. Our purpose with this blog is to provide valuable and accurate content for solely informational purposes. We strongly advise our readers to consider all the risks and health concerns before taking a DIY project. We also highly recommend you get fully informed about the laws and regulations regarding electrical, plumbing and other work in the different states of Australia.


The only home improvement newsletter you will ever need!
We will never spam you. Pinky promise!
For more information, check out our privacy policy.


