
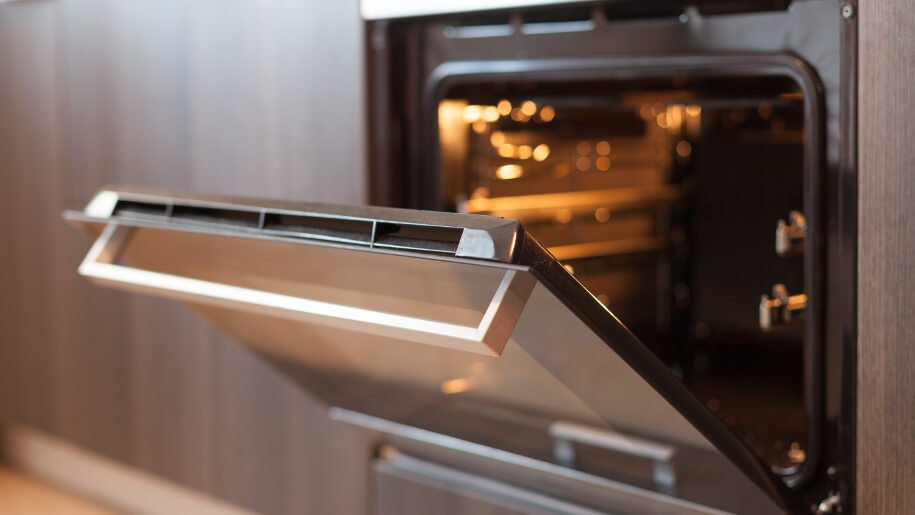
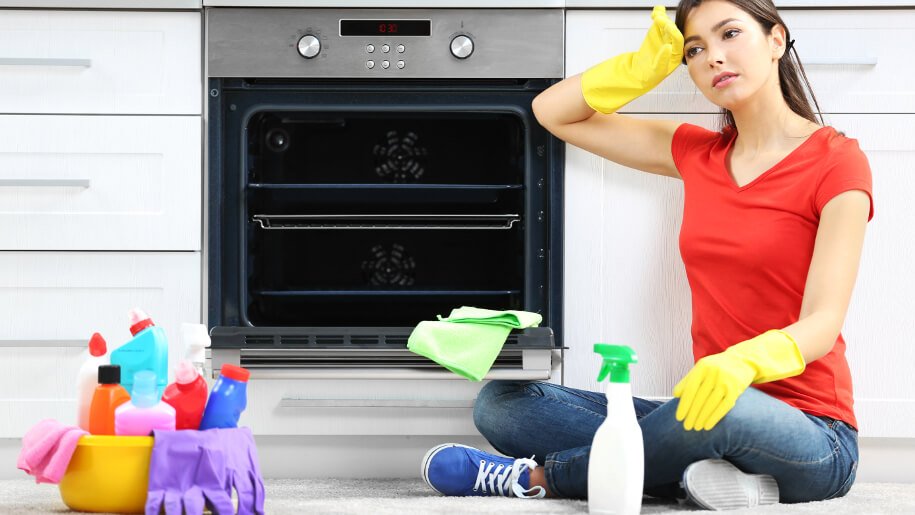
Cooking tasty dinners, and baking delicious banana bread and desserts will eventually make a mess in your oven. Food debris and grease can easily accumulate inside the kitchen stove, as well as, food splashing and falling over trays leaving grime behind.
Taking the time to regularly clean your oven is crucial for ensuring that the appliance is safe to use and that the food you’re making has its best qualities preserved.

Not cleaning your oven regularly will not only make it unpleasant and old-looking but it can also be a potential health hazard. Over time, grease and food residue build up inside of it and food spillages turn into cooked-on carbon monoxide which can be potentially threatening for your health.
Cooking at a high temperature with old food debris stuck to the oven’s interior can become a serious fire hazard. Grease and food residues usually stick to the metal trays, grills, racks, heaters and oven bottom. If you use your oven that dirty, the debris will continue to burn which may result in a fire accident. It may also result in filling the oven and the kitchen with thick smoke which can damage the food you’re cooking.
A dirty oven will have a negative effect on the food you’re cooking. An oven full of old grease and food residue can ruin the taste and the smell of the meals that you’ve worked so hard to prepare.
The dirt inside the oven can reduce the efficiency of the appliance. It can prevent the oven’s heat sources from warming up thoroughly which is likely to result in having uncooked food. This can be very dangerous in cases of cooking meat or fish because it may lead to food poisoning.
As mentioned above, heating up grime and grease over and over again will leave a nasty smell in the kitchen and eventually in your whole home. Deep cleaning your oven regularly, however, will prevent this from happening. Keeping the oven grease- and residue-free will also prolong the life of your appliance.
When it comes to oven cleaning, it is preferable to avoid using harsh cleaning detergents, especially on the inside. There are numerous recipes for homemade eco-friendly cleaners you can test. Keeping the process as natural as possible will protect your food from chemical residue that may pose a threat to your family’s health.
However, in the case of a very dirty oven, stronger cleaners may work faster. Here is how you can quickly deep clean the inside of your oven in just a few easy steps:

Different oven types require different cleaning methods. Before proceeding with the disinfection, you need to check what is the type of oven you’re dealing with.
Determine if it’s a gas, electrical, traditional, self-cleaning, or Continuous Clean oven. It’s a good idea to read the manufacturer’s instructions for cleaning and maintenance. They should be available online for your exact model.
Gas ovens have burners located on the bottom. You should clean them thoroughly, along with the rest of the appliance.
However, you may find out that the bottom of a gas oven is a real challenge to clean. You can still achieve your goal by:
You can inspect the burners for clogs. If the flames are not symmetrical from both sides when you turn the burners on, you may be dealing with clogged holes. If that’s the case, use thin wire and insert it into the clogged holes to remove any leftover food from there. If you do this at the beginning of your oven cleaning process, remember to turn off all your gas burners and allow the stove to cool down completely before proceeding for safety reasons.
Unlike gas ovens, electric ovens have two heating elements – one on the top and one on the bottom. Most of the models have the ability to disconnect the oven door from the hinges. This way you’ll be able to reach deeper and clean thoroughly.
Like gas ovens, electrical ones can be with a removable bottom, so you should be able to clean the burners again. Some models even have the burners visible, so you don’t need to remove the bottom in order to clean them.
Wipe out the burners with a dry microfiber cloth. Then mix a little dish soap with warm water. Put a cloth or a sponge in the mixture and wipe the burners gently.
Make sure you leave the burners to air dry completely. Wait at least a couple of hours before turning on the oven, just to be on the safe side.
After cleaning the burners you can continue with the step-by-step process of cleaning the interior of your electric oven that we mentioned at the beginning of the guide.
The self-cleaning cycle of some ovens turns any spills, stains and residue into a pile of ash which can be easily wiped away after the cleaning cycle. Most of the homeowners are not sure how often to use the self-cleaning cycle of their oven. Truth is, it depends on how frequently you turn the appliance on.
If you use your oven every day to cook meals, you should clean it at least once a week. Still, using the self-cleaning cycle for every little spill of food is not a good idea. Run the cycle only when you want to deep clean the oven.
There are two types of self-cleaning ovens – traditional, using high temperature, and steam cleaning ovens. Some of the newer models offer both types of cleaning methods. These types of ovens do most of the cleaning for you, but still, you should be involved in the process.
There are a few important things to remember before proceeding with the oven cleaning:

The traditional self-cleaning cycle can be between 2 to 5 hours long, depending on how dirty is the oven. The temperature can get as high as 400-500°C. The food residue will become ash on the bottom of the oven after the cycle is finished.
Don’t leave anything on top of the oven during the cycle as it can melt and damage the stove. Don’t block the vent during the cleaning cycle. The oven should be locked during the process.
During the cycle, food residue is burned and carbon monoxide is produced. Make sure you have the windows open and the fans turned on the whole time to help the smoke leave the room easily and prevent it from sticking to walls, furniture and ceilings.
After the cleaning cycle, wipe out the inside of the oven, until you remove all ash left inside. You’ll also need to wipe out the inner side of the door with warm soapy water to remove oil residue and ash.
The smoke fumes can be dangerous for birds, hamsters or other small pets, so be sure to remove them from the room during the cleaning. It’s also not recommended to apply oven cleaner or another harsh chemical onto the oven door.
During the cycle, water is added to the indicated place on the bottom and the high temperature produces steam to remove food debris. The steam self-cleaning cycle is much shorter. Usually, it lasts between 20-40 minutes.
Throughout the process, less smoke is produced and the method is safer than the traditional self-cleaning. It’s still a good idea to open the windows and ventilate the room. Wait until the oven cools off and wipe out the inside with a cloth or sponge to remove ash and residue.
Again, never use a cleaning detergent during any of the self-cleaning cycles.

Continuous cleaning ovens have a special coating of a porous ceramic material, usually dark-coloured and rough to the touch. While spills happen during the cooking, they fall on the texture and burn off the residue. The surface absorbs the grease and brings it continuously to the surface, masking the spills that occur.
Because of its special coating, it’s not recommended to use harsh chemicals or commercial oven cleaning, because they can damage the surface.
To clean an oven of this type, remove the racks and scrub out any food residue that can be easily removed. Use a few drops of soap in warm water and scrub the inside of the oven with a cloth or sponge.
Get a professional to tackle the cleaning of the appliance instead!

When it comes to cleaning the parts inside of the oven we’re talking about a job that rarely gets done. That is why it needs extra attention and hard work.
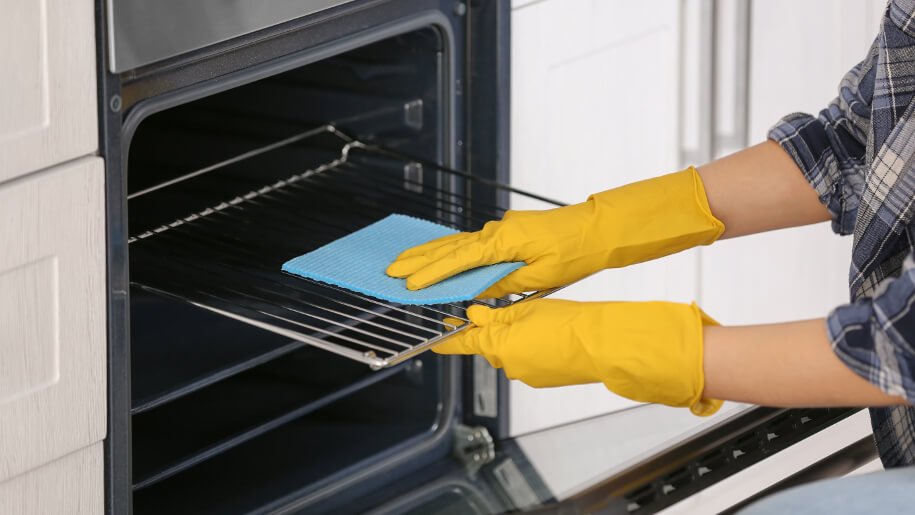
The oven racks are quite a pain point when it comes to cleaning. You can’t leave them in a self-cleaning oven cycle and they’re nearly impossible to scrub effectively by hand.
There are a few ways to clean the oven racks and almost all of them include soaking them in hot water. Here is how it’s done in short:
A popular belief is that you need to soak them overnight for better results but actually you need to do the scrubbing while the water is still warm.
In addition to using baking soda and vinegar, there are other available methods for cleaning the oven racks. Our favourite method, though, is to use a ball of aluminium foil. Learn how to do it yourself by checking the info on How to Clean Oven Racks with Aluminium foil.
What else can work well? That can be ammonia and a garbage bag combination. It’s appropriate for oven racks that have never been cleaned. However, it is very important to be extremely careful.
If you decide to use this method, do it outside. Place the oven racks in a heavy-duty garbage bag. Lay it flat and add ammonia to the bag. Wear eye protection and gloves while you’re doing that!
Tie the bag securely and let it sit for 12 hours. The next morning cut the bag and rinse off the oven racks with water. It might look like they are still dirty but the grease will come off really easy with just steel wool pads.
It’s not the soaking in the ammonia that helps clean the oven racks. It’s the chemical reaction from the fumes.
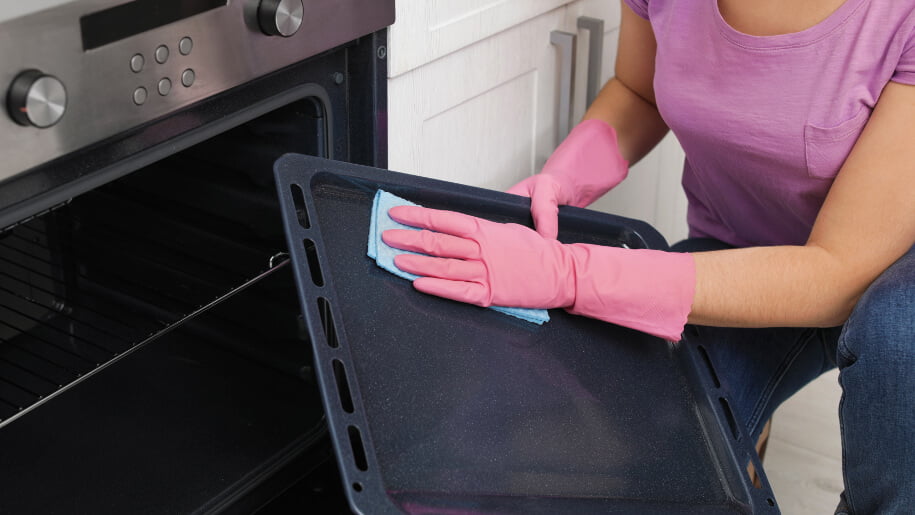
The trays of your oven can easily build up a lot of grease over time. Therefore, if you want to save yourself a lot of effort, it’s important to choose the right cleaning method for removing it. Our suggestion is to use two very simple ingredients that you probably already have – baking soda and vinegar.
Step 1: Sprinkle a little baking soda in the oven tray and add just a little bit of water. Use a scrubby sponge to work the baking soda into some of the different stains.
Remember that if it’s a black mark, it’s probably not going to come off. Light to dark brown stains is going to disappear by just scrubbing them.
Step 2: Add some white vinegar to the baking soda. It will create a foam. This is the acid in the vinegar working on those built-up grease marks. Gently keep scrubbing and you’ll see the dirt coming off.
Optional: You can add some sea salt. Thus, the mixture will be abrasive and really aggressive on different stains. Keep in mind, though, that the sea salt may scratch your oven tray.
Step 3: For really hard stains put the tray back and heat the oven. That will activate the vinegar to work a little harder. After that turn off the oven and let the tray sit overnight.
Step 4: In the morning you can give it one more quick scrub. After that rinse it with warm water and it will be as clean as new.
Cleaning the outside of the glass oven door is not that hard. You can use a store-bought glass cleaner. However, if you’re looking for something natural and cheaper, here is a recipe for simple homemade glass cleaner:
Mix them together, spray the solution on a microfiber cloth and use some elbow grease to wipe the glass oven door. For best results, use a clean cloth to dry out the glass.
If you haven’t cleaned the glass door in a very long time or if there are grease marks or tough stains on the surface, use the same recipe but add 1 tbsp of cornstarch. It will make the solution stronger. Mix them together in the spray bottle and don’t forget to shake well. Also, shake well before every use.

You can’t skip on taking care of the stove top of your oven, too. You can make it clean and eye-pleasing in no time.
The easiest way to clean an electric stovetop is to do it every time after cooking. Simply wipe away any stains while it is still hot. Still, remember that baking soda is your best friend and it can help you clean that stovetop fast:
Knowing as many oven-cleaning hacks as possible can come in handy. Some of the most popular involve recipes for eco-friendly oven cleaners, which is no surprise considering the central role of the appliance in the preparation of food. Here are some common oven-cleaning methods that are safe, easy to also effective:
This is definitely something to try, as both necessary ingredients cost very little, but they are known to create an efficient homemade cleaner. Here’s how it works:

Lemon is not just a good provider of vitamin C but also another example of a great natural oven cleaner. There are a few ways to implement the fruit into the disinfection of the appliance:
This is a more suitable method for regular wiping and maintenance of the oven, but could also serve as a pre-treatment before deep cleaning. Removing tough stains and food pieces is hard, but you can save yourself a lot of effort by putting a bowl of water mixed with lemon juice inside the oven and turning it on.
The steam from the bowl will loosen any grease and burnt-on pieces, which leaves you with less scrubbing to do. Just make sure the oven is a bit warm when you begin cleaning it to avoid burning.
Take advantage of more than just the lemon juice to make your oven shine again. For a general freshening of the appliance, cut one lemon in half and gently scrub the inside of it, followed by wiping it with warm water. The lemon will leave a nice smell, eliminate greasy stains and disinfect the oven.
Keep in mind that store-bought lemon juice can’t be compared to those from freshly squeezed lemons. Mainly because it is not pure and contains various additives that help preserve it longer. The same applies to lemon essential oil, although this is preferred when compared with the bottled lemon juice. On its own, the oil will be tough to clean, so it still needs to be diluted. Therefore, it is always best to choose real fresh lemons for extracting the best of your oven cleaning efforts.
First of all, is cleaning your oven with ammonia safe? When handled properly and in small amounts, the product could be used for the disinfection of the appliance. Ammonia offered for household cleaning purposes varies from 3 to 10%, which means you have the option of choosing a more diluted product with a lower percentage of actual ammonia in it.
However, it has some disadvantages in comparison to the previously mentioned cleaning methods. The biggest one is the smell. It’s a strong smell that could cause watering of the eyes and hard breathing for people with allergies and higher sensitivity. In addition, it should be handled only with gloves and immediately rinsed off if in contact with the skin.
It is known to be quite effective for cleaning different oven parts like racks and trays by soaking them in water, preferably warm, along with half a cup of ammonia. They should stay in the solution for 15-20 min before washing and wiping them.
The inside of an electric oven can also be cleaned with ammonia by:
Ammonia is best to be avoided for cleaning gas ovens, as it could cause a reaction. Baking soda, vinegar and other eco-friendly alternatives are a better and safer option.
The true answer to that question lies in the frequency with which you use your oven. We all wish to be able to wipe the oven after every use, but life shows us that this isn’t always possible. Still, there are hidden dangers of cooking in a filthy oven, so don’t deprive your appliance of special care.
On average, your oven should get a good thorough clean of each element at least twice a year. You can also do a good wipe and scrub every two and twelve weeks. The time frame really depends on your habits.
For example, if you have a big family and cook large family dinners every single evening, your oven gets dirty faster and could use a wipe every week and thorough cleaning every 3 months or so. But if you’re a person who eats out a lot and uses the microwave more often, then your oven won’t need cleaning as often.

When the oven is clean, it retains heat more efficiently and it gets distributed evenly in the entire oven, which means that your food will be cooked well from each side. It’s always a pleasure to cook in a clean oven when there are no bad elements inside that can influence the taste of the food.
Your oven is way more energy efficient when it’s properly cleaned both inside and outside. The clean oven reaches the needed temperature faster by using less energy, and the whole cooking process takes less time. This will save you money on electricity each month.
When looking through a brown and stained oven door glass you can’t see anything inside, which makes people open the door more often to see if the food is ready. This releases heat, the appliance tries to compensate for it by using more energy to get back to the original temperature, and this makes the food cook slower. So, simply wiping the oven doors from time to time will save you some money.
The burnt food and grease produce smoke and fumes, which are dangerous to our health because they can cause momentary respiratory irritations coughing, and many other unpleasant effects in the long term. Also, oven dirt harbours a lot of bacteria, and this is not a good environment to cook your food in.
Carbonised grease is what happens when grease and dirt stay for too long in the oven, they become rock-hard and almost impossible to remove. It settles all over the appliance – over the walls, the grates, even the hobs – and it’s a serious fire hazard. Since grease is flammable, it can cause a fire in the house or apartment.
Grease and dirt can also build upon the internal fan, which can make its work more difficult, damage the electrical circuits, cause a spark and ignite a fire. So, keeping your oven clean is a good fire prevention method.
Last, but definitely not least, ovens that are cleaned regularly last a lot longer and need fewer repairs. The grease and splatters have the ability to get to even the most hidden parts of the oven over time, so regular maintenance is the only way to prevent that.
Book a specialised oven cleaning service with the pros and save yourself the troubles!


The only home improvement newsletter you will ever need!
We will never spam you. Pinky promise!
For more information, check out our privacy policy.


")

